How to Convert a Flagpole into a Christmas Tree Light Display (2025 Expert Guide)
Turning a flagpole into a cone-shaped “tree” of lights is one of the fastest, cleanest ways to elevate holiday curb appeal—without ladders against eaves or tangled gutters. This guide walks you through planning, power choices, safe installation, and creative patterns, grounded in professional flagpole knowledge. We’ll reference Atlantic Flagpole’s resources on lighting for flagpoles, solar flagpole light options, and topper compatibility so you can build a display that looks tailored—like a luxury suit—fitting your property, budget, and craftsmanship standards.
- Planning: Measure your flagpole height and yard radius to size light strands correctly. Topper type (ball, eagle, or ornament) affects how to attach the apex ring or clip; see the flagpole topper guide.
- Power: If running cords is inconvenient, review solar flagpole light options for accent or supplemental illumination. Grid power with GFCI and weather-rated connectors is the standard choice.
- Safety: Follow best practices from lighting for flagpoles—use outdoor-rated LEDs, weatherproof connections, and secure tie-downs to handle wind.
- Installation: Telescoping poles can simplify seasonal setups—see best telescoping flagpole for context. Avoid drilling into the pole; use non-marring rings, clips, and carabiners.
- What to look for: Weather-rated LED strands, robust insulation, reliable top attachment, even strand tension, and a base anchor ring or stakes for symmetry.
- Top brands and prices: This guide doesn’t cite specific brands or prices due to the lack of product data. Instead, use the criteria here to compare quality, materials, and features in your budget.
- Craftsmanship mindset: Treat the build like a well-made Italian suit—clean lines, consistent spacing, and quality materials over volume. Fewer, better lights often look more luxurious than more, cheaper strands.
- Wind readiness: Choose attachment points and base stakes that won’t chafe, back up with secondary ties, and inspect after storms.
- Sizing shortcut: Per-strand length ≈ slant height of the cone. Use s ≈ √(pole height² + base radius²) + 1–3 ft for anchoring.
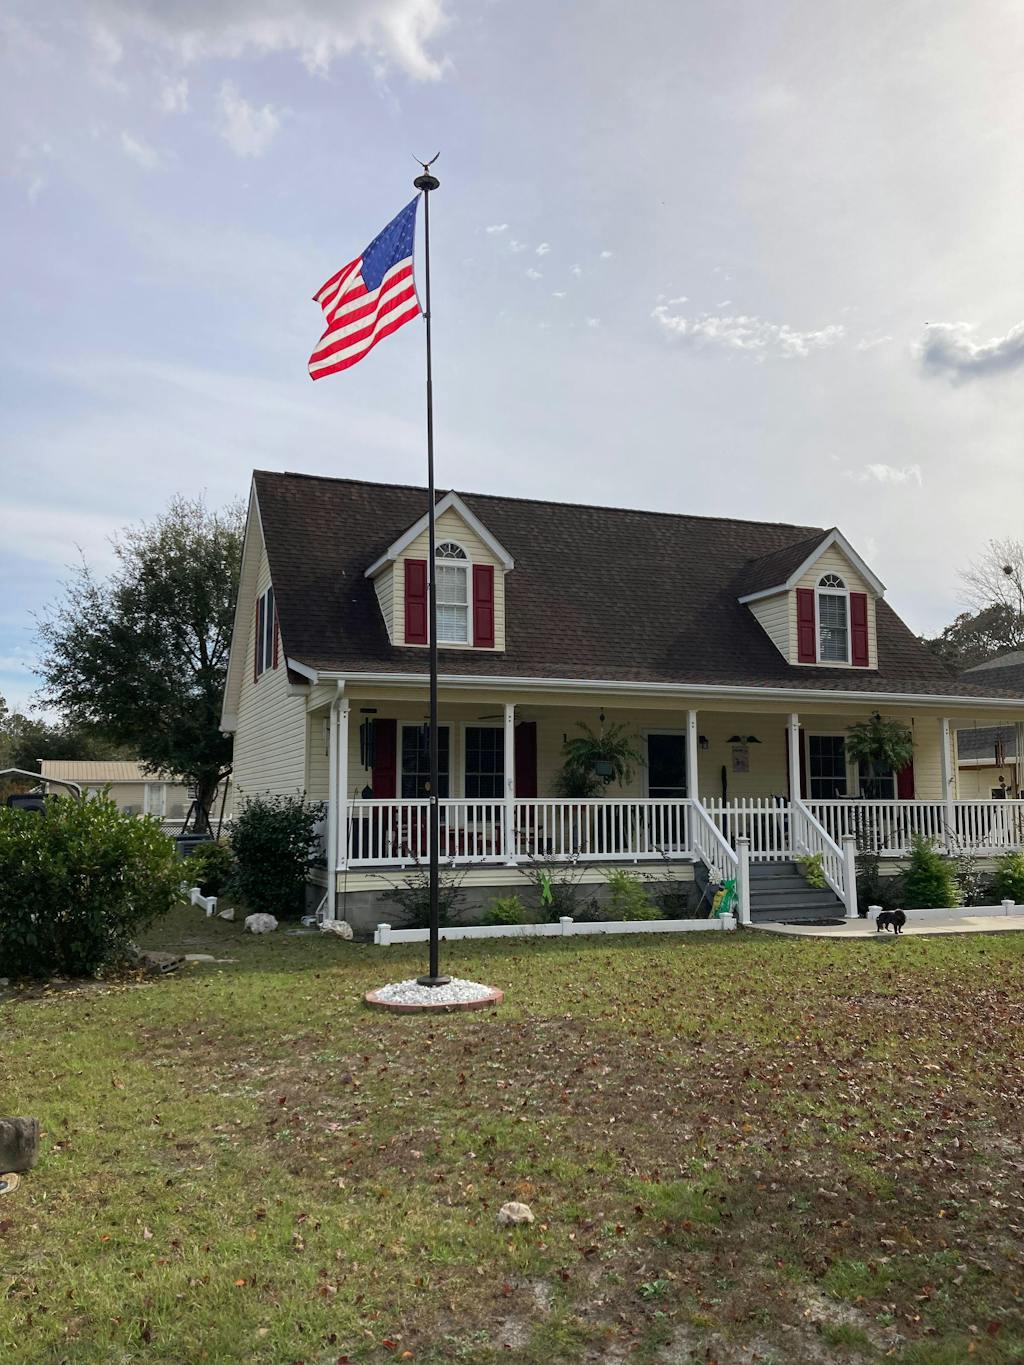
Why a flagpole Christmas tree works—and looks “tailored”
Flagpoles offer a perfect centerline to hang a symmetrical cone of light. Done right, the display resembles a precision-tailored garment: clean seams (light strands), even spacing, and materials built to weather. A telescoping pole lowers for easier setup and inspection; a fixed pole requires a stable top attachment method and dependable base anchors. If you’re deciding on a new pole with holiday use in mind, review flagpole buying considerations for height, location, and wind exposure before you invest.
Etiquette note: Don’t fly a flag where it can contact or tangle with the light strands. If you illuminate a flag overnight, ensure dedicated, respectful lighting separate from the decorative tree effect.
Measurement & Planning
The cone shape is only as elegant as the measurements behind it. Start by noting your pole height, canopy diameter, and available power. Then audit the top of your pole—ball finial, eagle topper, or other ornament—to determine compatible attachments for light strands.
- Flagpole height: Confirm exact height from base grade to topper. This helps you choose strand lengths and the number of vertical runs for full coverage.
- Base radius: Decide how wide you want the “tree.” A wider base increases strand length need and improves the cone’s visual fullness.
- Topper compatibility: The flagpole topper guide outlines common shapes and mounting methods. Some toppers accept a ring or clip; others require an intermediate attachment (e.g., carabiner under the finial).
- Eagle toppers: If you have an eagle topper, check the eagle flag pole top resource for dimensions and mounting considerations before selecting a top ring.
- Wind exposure: A cone of lights is a sail in high winds. Use site-specific insights from flagpole buying considerations and plan extra tie-downs if your property gets gusty.
- Pole height (from grade to top of finial): ____ ft
- Desired base diameter (tree width): ____ ft
- Base radius (diameter ÷ 2): ____ ft
- Calculated slant length per strand: √(height² + radius²) = ____ ft
- Extra length for anchoring and routing (add 1–3 ft): ____ ft
- Number of vertical strands planned (target spacing 8–12 in around the circumference): ____
- Top attachment type (ball/eagle/other): __________
- Top ring or clip needed? Y/N
- Base anchors or ring ready? Y/N
- Power source (GFCI outlet / solar accent / timer or smart plug): __________
- Light style (warm white / multicolor / RGB) and color temperature preference: __________
- Wind exposure (low/medium/high) and tie-down plan: __________
Power Options and Wiring Strategy
Start with safety, then simplify. Atlantic Flagpole’s lighting for flagpoles overview highlights brightness, beam spread, and wiring best practices. For flagpole “trees,” you’ll typically choose between grid power and solar accent lighting.
- Grid power: Use outdoor-rated LEDs and weatherproof connections, plugged into a GFCI outlet. Timers or smart plugs reduce manual on/off and allow automation. For long runs, use appropriately gauged outdoor cords and keep connections off the ground with drip loops.
- Solar accent lighting: See solar flagpole light options to reduce or eliminate extension cords near the base. Solar can also illuminate the pole or topper while mains power drives the strands.
- Wire management: Bundle connections above the base in a protected, weather-rated enclosure. Route cords away from walkways and cover them where foot traffic is likely. Label runs and keep low-profile cable ties facing inward for a clean, non-snag finish.
- Controls: Smart plugs with sunrise/sunset automation or weekly schedules keep consistency. If using RGB or addressable lights, place controllers in ventilated, weather-rated boxes.
Installation Tutorial (Step-by-Step)
If you own a telescoping pole, seasonal installs are often easier—see best telescoping flagpole for general context.
-
Prep the site
- Clear the base area and mark your tree circumference using stakes, a flexible base ring, or temporary markers.
- Verify the ground sleeve and base components for stability; review flagpole kit basics to understand how the sleeve influences routing and tie-down paths.
- Dry-fit: Lay one strand from the top to the base marker to confirm slant length and anchor position before committing.
-
Prepare the top attachment
- Ball finial: Many DIYers use a non-marring ring or clip seated under the ball. Confirm it won’t damage the finish. A swivel at the attachment point helps prevent wind twist.
- Eagle topper: As per eagle flag pole top, check mounting clearance and consider a ring below the mount. Do not drill the pole.
-
Stage your lights
- Lay out the strands around the base boundary to confirm spacing and count.
- Check each strand for function before lifting anything. Keep a spare strand and extra fuses accessible.
-
Attach strands at the apex
- For telescoping poles: Lower the top section, connect strands to the ring/clip on the ground, then extend. This reduces ladder time and improves precision.
- For fixed poles: Use a stable ladder and helper. Attach strands one by one to the ring/clip under the topper, maintaining even spacing.
-
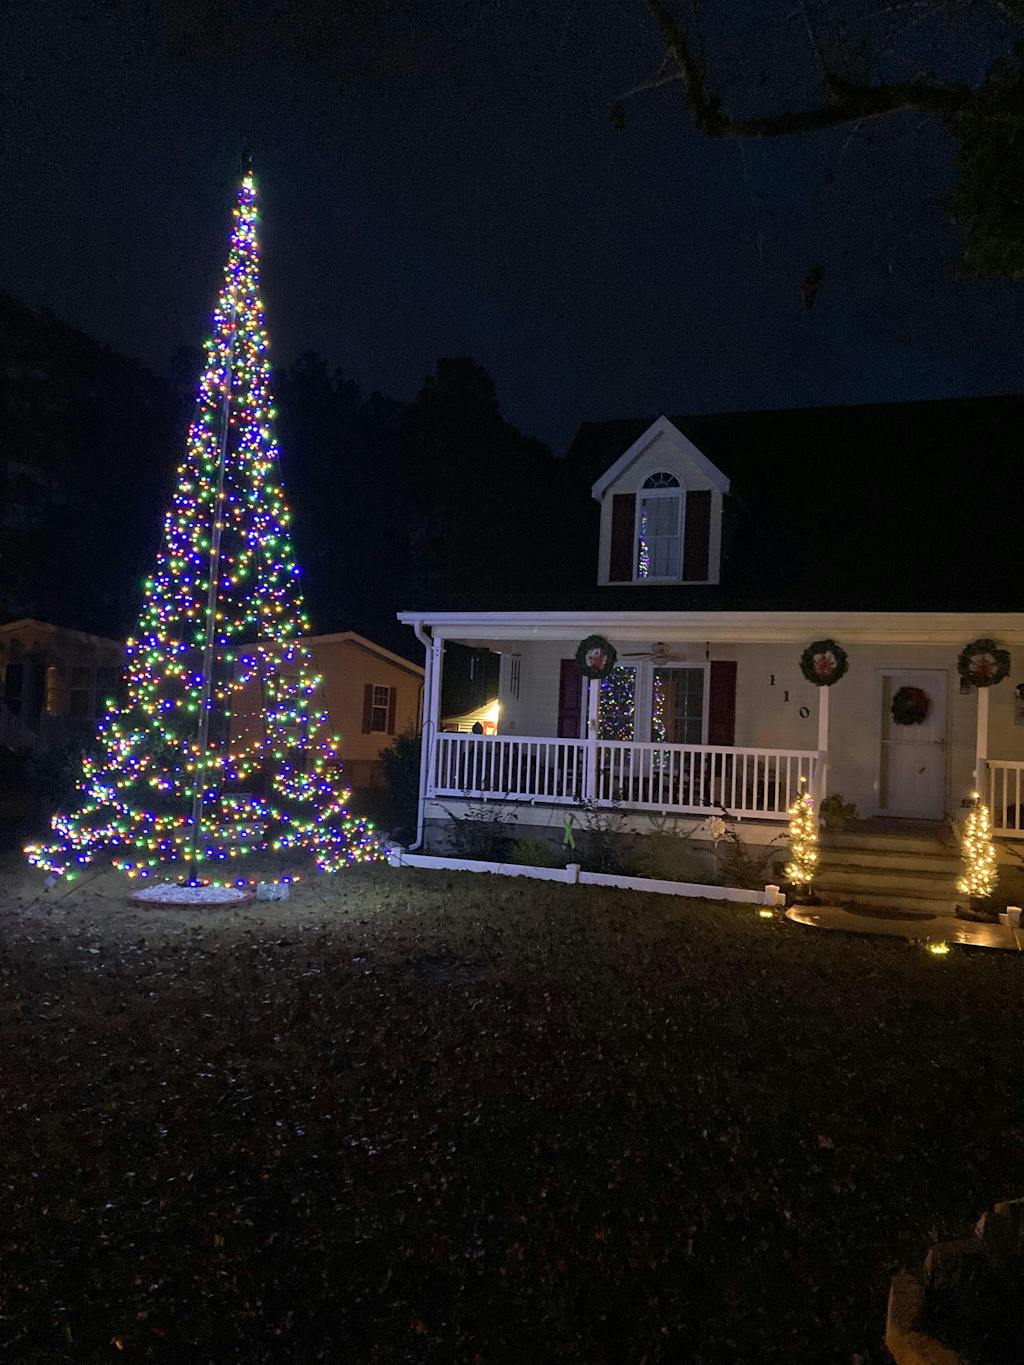
Create the cone
- Bring each strand down to the base marker, keeping tension even so the cone looks symmetrical.
- Anchor with stakes, a weighted base ring, or masonry anchors around pavers. Spiral ground anchors hold well in soft soils.
- Step back periodically and adjust spacing. Treat it like aligning the seams on a bespoke suit—clean, straight lines.
-
Connect power and program controls
- Bundle connections off the ground in a weather-rated enclosure.
- Plug into a GFCI outlet and set your timer or smart plug schedule. Test the GFCI’s “reset/test” buttons before leaving the system unattended.
-
Final tension and wind check
- Add secondary ties for high-wind sites; place them inconspicuously. Light-duty shock cord or soft ties can preserve tension without chafing.
- Verify no strand rubs against sharp edges or hardware that could chafe insulation.
Safety Guidelines You Shouldn’t Skip
- Use only outdoor-rated LED strands and weather-resistant connectors; review Atlantic Flagpole’s lighting for flagpoles for illumination and wiring fundamentals.
- Protect connections from moisture splash and snow; elevate and house them in a weatherproof box. Look for UL/ETL listings and outdoor IP ratings on cords, adapters, and enclosures.
- Use a GFCI-protected circuit. Avoid overloading by checking the total current draw across connected strands and respecting the manufacturer’s “max strings per run” guidance.
- Never drill your pole. Use non-marring rings, clips, and soft ties. Check compatibility with your topper style (flagpole topper guide).
- Keep cords clear of walkways, driveways, and plow paths. Use outdoor cord covers where crossing is unavoidable.
- Inspect after storms for any sagging or frayed spots. Re-tension as needed, and remove ice buildup to reduce loading.
Creative Patterns and Colorways
The cone is your canvas. Here are pattern ideas that respect the pole, weather, and visibility from the street:
- Classic warm white: Understated and elegant—like a fine Italian suit in navy. Fewer, higher-quality strands make a richer presentation than overly busy mixes. Aim for 2700–3000K for a relaxed, welcoming tone.
- Patriotic bands: Red, white, and blue vertically or in spiral sections to honor the season and your pole’s year-round purpose.
- Candy-cane spiral: Alternate red and white strands to form a gentle corkscrew around the cone. Create the spiral by offsetting base anchors by a consistent arc length.
- Twinkle accents: Use static strands for structure and add subtle twinkle on every third line for depth without chaos.
- Topper glow: If you have an eagle topper, consider a small halo or discreet uplight that respects the topper; see eagle flag pole top for compatibility notes.
- RGB scenes: If you choose RGB strands, keep a restrained palette and slow transitions so the cone reads as intentional, not noisy.
Maintenance Tips (Season-Long)
- Weekly glance: Walk the perimeter to check anchors, tension, and any abrasion points.
- After storms: Re-tension slack lines and reposition base anchors if the ground shifted.
- Connection health: Ensure enclosure seals are intact and dry; replace any suspect components.
- Automation check: Adjust timers for changing sunset times or switch to a dusk-to-dawn schedule for consistency.
- Pole care: Wipe the pole and hardware as needed. If you’re evaluating a new setup for next season, skim flagpole kit basics to understand parts that influence future light routing.
- End-of-season: Coil strands loosely, avoid tight bends, and label sets by location to speed next year’s install.
Troubleshooting
Start with the simplest checks first; many issues are connection-related.
- One strand out: Test the strand independently. Swap in a known-good strand to isolate the problem. Check inline fuses on the plug if applicable.
- Random flicker: Check for loose or damp connectors. Dry, reseat, and protect in a weather-rated box. Avoid mixing dimmable and non-dimmable strings on the same controller.
- Sagging cone: Re-anchor at the base and add gentle tension top-down. Consider secondary, transparent ties mid-run for stability.
- Wind shift: Add a second tier of low-profile ties halfway up the strand lines on high-wind sites (check surface compatibility to avoid abrasion).
- Uneven brightness: Verify consistent power path and avoid exceeding recommended strand count per circuit. See lighting for flagpoles for illumination planning.
- Tripped GFCI: Unplug, dry connections, reset GFCI, and reconnect one segment at a time to find the culprit.
Craftsmanship, Materials, and Value—for Every Budget
The most impressive flagpole “trees” have the same DNA as luxury suits: they start with quality materials and exacting workmanship. Whether your budget is conservative or generous, prioritize construction over gimmicks.
- LED strand quality: Look for outdoor-rated insulation, robust strain reliefs, and durable housings. Consistent color temperature across strands yields a cohesive look.
- Cabling and connectors: Weatherproofing matters. Protect junctions from moisture and mechanical stress. A clean, hidden connection cluster is your “hand-sewn seam.”
- Attachment hardware: Non-marring rings and clips protect finishes and prevent corrosion points. Treat the pole like a fine fabric—no drilling, no sharp edges.
- Balance and proportion: Aim for even spacing that matches pole height and yard scale. Overfilling is the lighting equivalent of an ill-fitting suit.
- Wind-ready design: Gentle pre-tensioning and secondary ties keep lines straight through weather, preserving that crisp, tailored silhouette.
Video Walkthrough (Embed Opportunity)
Record your install and embed it here for family or neighbors to follow next year.
Frequently Asked Questions
Do I need to remove my topper? Not necessarily. Many displays use a ring or clip seated under ball or eagle toppers. See the flagpole topper guide and eagle flag pole top for compatibility considerations.
Can I rely solely on solar? Solar is excellent for accenting the pole or topper and for minimizing cords. For dense, bright cones, many homeowners still prefer mains power; read solar flagpole light options for planning.
How do I keep the cone shape perfect? Even spacing at the top, a stable base ring or well-placed stakes, and slight pre-tension across all strands. Inspect after storms and re-tension quickly to maintain the “tailored” look.
What about telescoping poles? They simplify attachment and maintenance by reducing ladder work. For context, see best telescoping flagpole.
How many strands do I need? Divide the base circumference (2πr) by your desired spacing between strands (typically 8–12 in). Round to the nearest whole number and add 5–10% for adjustments or spares.
What color temperature should I choose for white lights? 2700–3000K reads warm and classic; 3500–4000K is cleaner and slightly cooler. Keep all strands within the same range for consistency.
Next Steps and Resources
Use Atlantic Flagpole’s practical resources as you finalize your plan:
- lighting for flagpoles — plan brightness, placement, and safe wiring.
- solar flagpole light options — reduce cords and simplify the setup.
- flagpole topper guide — ensure your apex attachment is compatible.
- eagle flag pole top — understand eagle-specific sizing and mounts.
- best telescoping flagpole — easier seasonal installs.
- flagpole kit basics — ground sleeves and hardware that affect routing and anchors.
- flagpole buying considerations — height, siting, and wind exposure.
- Atlantic Flag & Pole News — browse more seasonal tips and guides.
If you approach your flagpole Christmas tree like a master tailor—measuring precisely, choosing quality materials, and finishing cleanly—you’ll create a display that feels upscale and intentional season after season.